UPDATE: Based on the following TechNet Forum Thread, creating Volume Licensing App-V Packages of Office 2016 is no longer supported. See here for a list of supported Product IDs: Product IDs that are supported by the Office Deployment Tool for Click-to-Run
If you are currently deploying Microsoft Office using for example ConfigMgr, you are probably using the MSI based Installation Method. Creating a Custom MSP with the OCT (Office Customization Tool) is pretty simple and was long a Best-Practice.
Since Office 2013, Microsoft has changed the Way, how they deliver Microsoft Office. With the Click-To-Run Installer, there is actually a built-in App-V Client in Office. (To verify that you can search for *AppV* in the Office Installation folder and you will find some EXEs and DLLs that will be very familiar if you know App-V.) With that knowledge that Office Itself is running virtualized when using Click-To-Run, the steps for creating an App-V Package are very straight forward. Microsoft actually recommends to go for a Click-To-Run or App-V based Deployment.
Let’s go trough some facts first:
- You need to use ODT (Office Deployment Toolkit) to generate the App-V Package. Sequencing Office 2016 manually using the App-V Sequencer is not supported!
- It is only supported to run one (1) App-V Package that contains Office Components. If you want to deploy for example Office Professional Plus 2016 and Visio 2016 you have to create 1 Package with both components in it.
- A generated Office App-V Package is supported 1 Year. After that you need to update it to include the latest Office Updates. (Statement of a MSFT Employee)
- It is not supported to edit the generated App-V Package using the App-V Sequencer.
- You can Enable / Disable Shortcuts and Applications to hide some Components.
- You can use AppLocker to lock down some components.
- You can Configure the virtualized Office normally using Group Policy Objects.
- You can use your normal KMS to activate Office.
More Informations about the Packaging, publishing and deployment requirements can be found in the following TechNet Article: Deploying Microsoft Office 2016 by Using App-V
In this Blog Post, we will create an App-V Package, that contains the following Components:
- Office Professional Plus 2016 (Volume License Edition)
- Visio Pro 2016 (Volume License Edition)
- Project Pro 2016 (Volume License Edition)
Creating the App-V Package
1. Create the following two Folders on your C: Drive, using PowerShell:
New-Item -ItemType Directory -Path "C:\Temp\Office 2016" -Force
New-Item -ItemType Directory -Path "C:\Temp\Office 2016 AppV" -Force
2. Download the Office 2016 Deployment Tool
3. Run the Setup and extract the Files to C:\Temp\Office 2016
4. Open the configuration.xml:
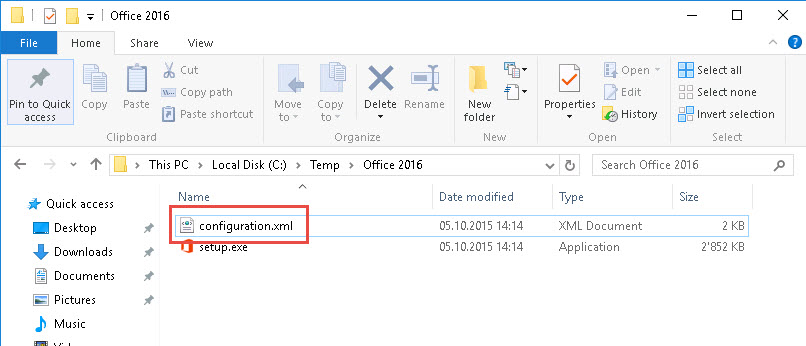
Here you can specify the components which will be included in our App-V Package. You can take my Configuration as Template and adjust it, that it fits your needs. You can also use the following XML Generator, to quickly create your customized template.
<Configuration>
	<Add SourcePath="C:\Temp\Office 2016" OfficeClientEdition="32" Branch="Current">
		<Product ID="ProPlusVolume">
			<Language ID="en-us" />
		</Product>
		<Product ID="VisioProVolume">
			<Language ID="en-us" />
		</Product>
		<Product ID="ProjectProVolume">
			<Language ID="en-us" />
		</Product>
	</Add>
</Configuration>
Let’s go through each tag.
Add
- SourcePath: Specify here the temporary folder, that you already created in Step 1, which will store the downloaded office data.
- OfficeClientEdition: Specify if you want the 32-bit or the 64-bit Version of Office.
- Branch: Specify the Branch (Current or Business) that you want to download.
Product
Specify here, which components or Products you want to include in your App-V Package. You can choose from the following:
- O365ProPlusRetail
- O365BusinessRetail
ProPlusVolume(no longer supported, see Note on the Top)- VisioProRetail
VisioProVolume(no longer supported, see Note on the Top)- ProjectProRetail
ProjectProVolume(no longer supported, see Note on the Top)- SPDRetail
Project and Visio must be added as separated products, as in the XML Configuration Example above.
Language
Specify the language in which Office should be delivered.
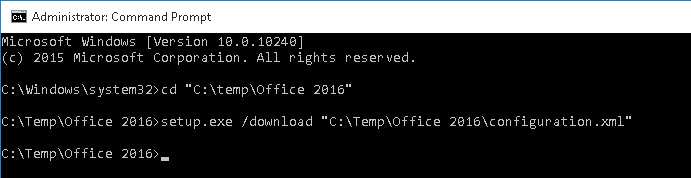
5. Execute the following command in an elevated command prompt to download the Installation Files:
cd "C:\Temp\Office 2016"
setup.exe /download "C:\Temp\Office 2016\configuration.xml"
Depending on your Internet Connection, your Installation Files will be downloaded within a few minutes. The Download is finished, as soon as the last command was finished executing.
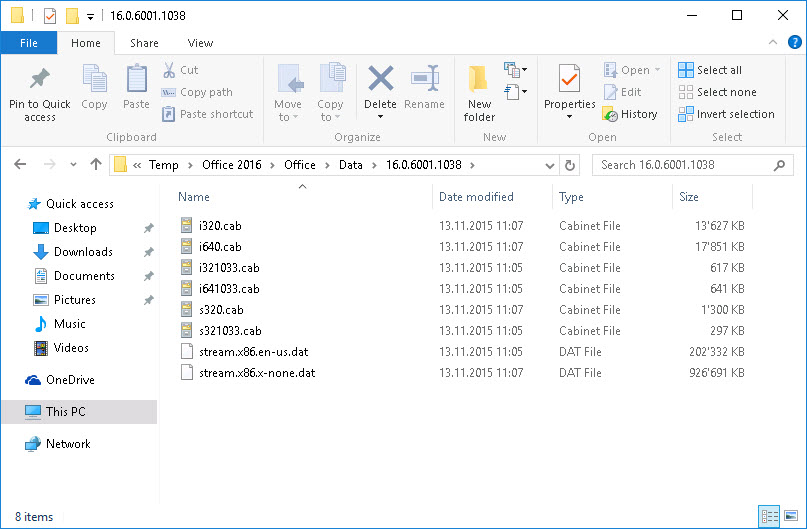
You can view the downloaded files in the folder “C:\Temp\Office 2016\Office\Data\{Version}”:
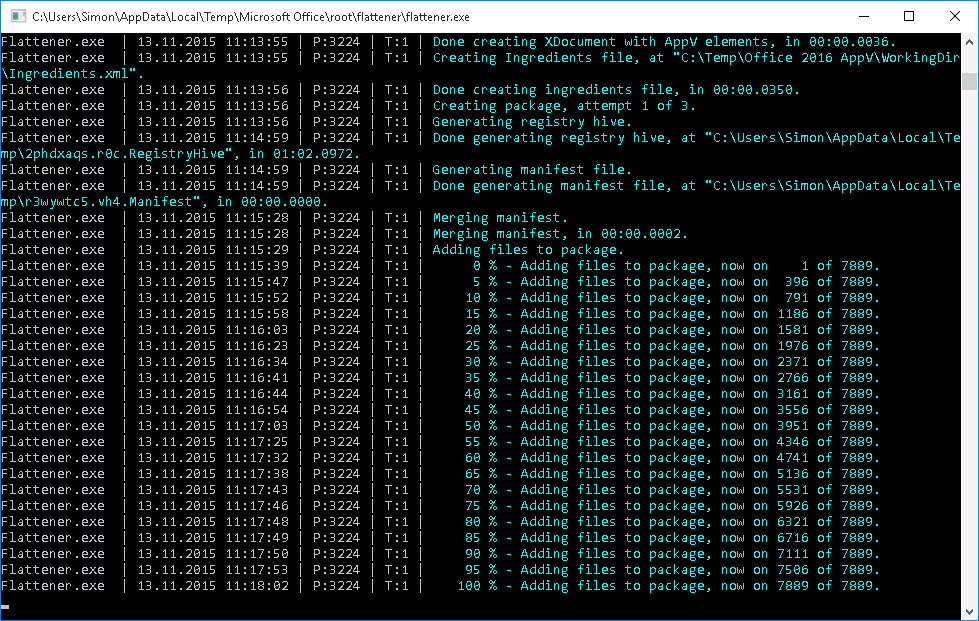
6. Execute the following command in an elevated command prompt, to create the App-V Package from the downloaded files:
cd "C:\Temp\Office 2016"
setup.exe /packager "C:\Temp\Office 2016\configuration.xml" "C:\Temp\Office 2016 AppV"
Based on the performance of your Workstation, this step can take up to 10 Minutes. After a short time, you can see the Package getting created. So, sit back and enjoy the Show 🙂
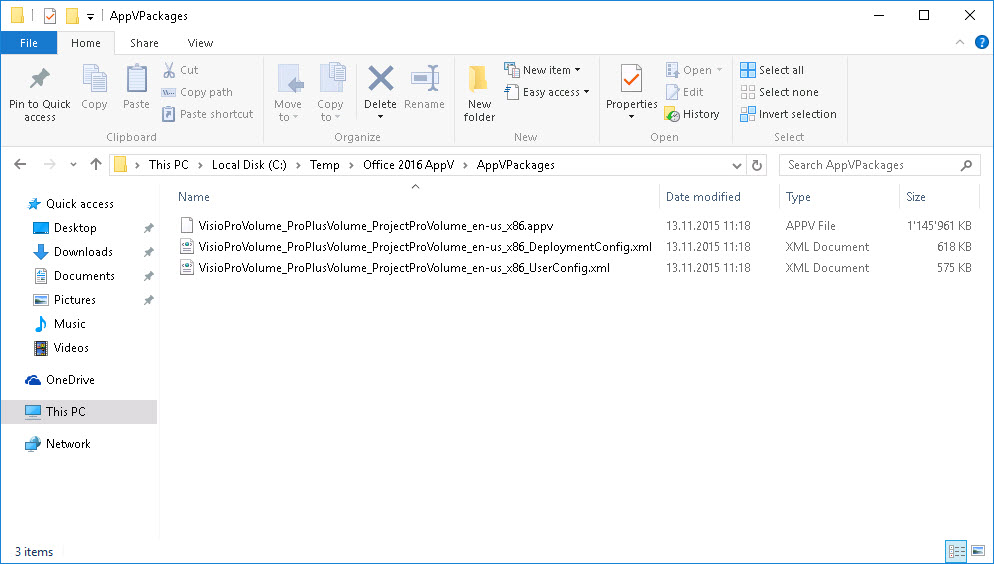
7. Navigate to the folder “C:\Temp\Office 2016 AppV\AppVPackages”, where you will find your App-V Package:
Deploying the App-V Package
For deploying the App-V Package, you can use either ConfigMgr or you can do it manually via PowerShell. The Deploying Process is no different from any other App-V Package. If you want to deploy the Package using an App-V Full Infrastructure, you can checkout my blog post: How to configure an App-V 5.1 Full Infrastructure
My Demo Machine that I use in this Example contains a Windows 10 Enterprise and an App-V 5.1 Client.
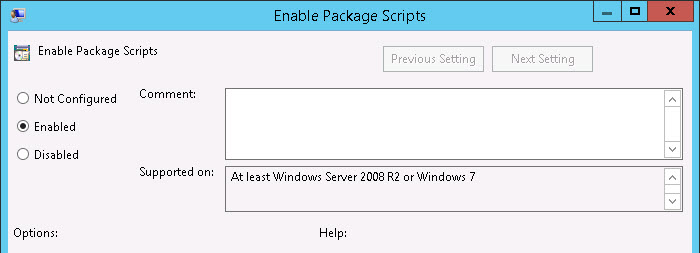
1. For the App-V Package to work, you need to enable Package Scripts first! You can do this using Group Policy Objects or PowerShell:
Computer Configuration\Administrative Templates\System\App-V\Scripting\Enable Package Scripts = Enabled
You can also use the following PowerShell Code that must be executed in an Elevated PowerShell Prompt, to configure the Package Scripts locally on a specific client.
Import-Module AppvClient
Set-AppvClientConfiguration -EnablePackageScripts 1
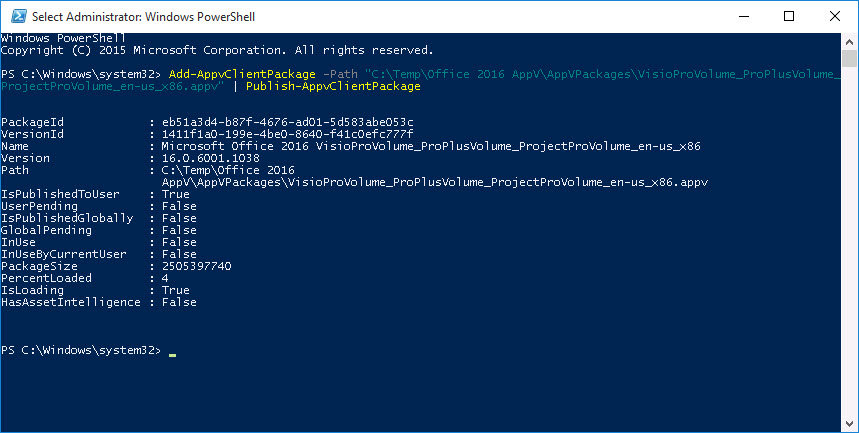
2. Execute the following PowerShell Command in an Elevated PowerShell Prompt, to Add and Publish the Office Package. Adjust the Path to your appv File if necessary.
Add-AppvClientPackage -Path "C:\Temp\Office 2016 AppV\AppVPackages\VisioProVolume_ProPlusVolume_ProjectProVolume_en-us_x86.appv" | Publish-AppvClientPackage
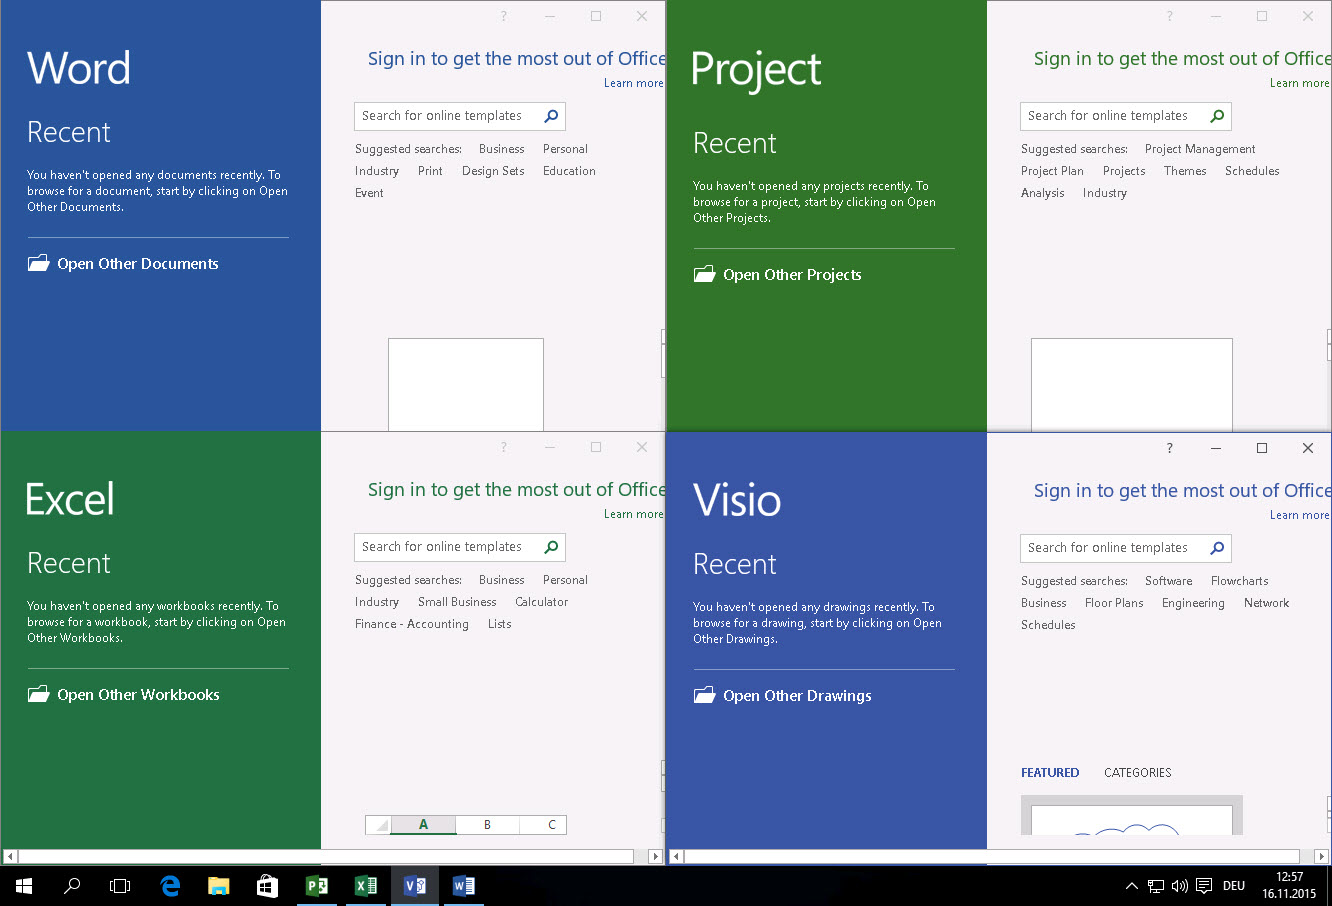
3. You should now find all the Office Shortcuts in the Start Menu and you should be able to Start and use the Products.

To verify that Office runs virtualized, you can run the following PowerShell Command while some Office Components are started.
Get-AppvVirtualProcess

If you have any question or additional notes, drop them in the comment section below.
Thank you for your well detailed post. I have a question, where would you specify the ospp to activate to a defined kms?
Thank You,
Hi Abraham
The ospp.vbs is copied to the local Office16 Directory during publishing: C:\Program Files (x86)\Microsoft Office\Office16
Best Regards,
Simon
Thanks!, I will try that.
In relation to these 2 points, is there a TechNet article referencing these?
-It is only supported to run one (1) App-V Package that contains Office Components. If you want to deploy for example Office Professional Plus 2016 and Visio 2016 you have to create 1 Package with both components in it.
-A generated Office App-V Package is supported 1 Year. After that you need to update it to include the latest Office Updates.
Hi Glen,
Those were both Statements i got from a MSFT Employee.
Best Regards,
Simon
Here is the article:
https://technet.microsoft.com/en-au/library/dn817830.aspx
All of the Office applications that you want to deploy to users must be in a single package.
• You can publish only one Office package to each client computer.
• You must publish the Office package globally. You cannot publish to the user.
There are recommended methods for excluding specific Office applications from a package.
Thank you, I updated the blog post.
You can create multiple packages using the following in your customconfig.xml file:
Tons of fun here – ExcludeApp is my favorite!
https://technet.microsoft.com/en-us/library/jj219426(v=office.15).aspx#BKMK_PropertyElement
PowerShell GUID generator: [GUID]::NewGuid()
Replace “RANDOM_GUID” with the new GUID generated
If you do not specify a different Package GUID for each package the Management Server will prevent you from loading the package variants.
Since it is a requirement to deploy the packages GLOBALLY (machine based targeting) there should be 4 Package variants:
1. Office 2016
2. Office 2016 w/Project
3. Office 2016 w/Visio
4. Office 2016 w/Project and Visio
Group the machines that need the required package variant. If the packages are deployed to the Machine Groups as designated the deployment meets the minimum requirement.
Hi Simon,
Great read, thanks for posting!
In the products list ProjectProRetail appears twice. I believe one of them should be ProjectProVolume?
When I am trying to Add the final package to My App-V Full Infrastructure (setup using your post) I am receiving the following error:
“The package VisioProVolume_ProPlusVolume_ProjectProVolume_en-us_x86 was not added.
The file provided is not a valid AppV package file. Error code: 0x8051100F – .”
Any ideas?
Cheers
Chris
Hey Chris,
Thanks for the hint, I updated the Post. Are you able to add the Package to a Client via “Add-AppVClientPackage”? If this also doesn’t work, you should try to recreate the Package. I also experienced some situations, where I ended up with a corrupted App-V File.
Hi Simon,
I’ve managed to re-package the 2016 suite and setup a lab computer with the AppvClient installed. Below is the error I get when trying to add the package to via Add-AppcClientPackage.
PS C:\Windows\system32> Add-AppvClientPackage C:\AppVPackages\Office2016App-V\AppVPackages\VisioProVolume_ProPlusVolume_
ProjectProVolume_en-us_x86.appv | Publish-AppvClientPackage
Add-AppvClientPackage : Application Virtualization Service failed to complete requested operation.
Operation attempted: Retrieve Package and Version IDs From Package URL.
AppV Error Code: 0C8051100F.
Error module: Streaming Manager. Internal error detail: 74F00E0C8051100F.
Please consult AppV Client Event Log for more details.
At line:1 char:1
+ Add-AppvClientPackage C:\AppVPackages\Office2016App-V\AppVPackages\VisioProVolum …
+ ~~~~~~~~~~~~~~~~~~~~~~~~~~~~~~~~~~~~~~~~~~~~~~~~~~~~~~~~~~~~~~~~~~~~~~~~~~~~~~~~
+ CategoryInfo : InvalidResult: (:) [Add-AppvClientPackage], ClientException
+ FullyQualifiedErrorId : RetrieveGuidsFromPackageURL,Microsoft.AppV.AppvClientPowerShell.AddAppvPackage
Cheers
Chris
Hey Chris,
Interesting, I haven’t seen that error yet. Does it still occur when you try to re-create the package? Have you enabled Package Scripts as described?
Best Regards,
Simon
Hi,
you wrote that it is not supported to create more than on Office package. If i want to use Visio 2016 and Project 2016, what is the supported way to do this?
Thanks in advance.
Best regards
Tom
Hi Tom,
As far as I know, you need to include Visio and Project in your main Office App-V Package. You can control the Shortcuts using Deployment Configuration Files, for example. You can also block Visio and Project using AppLocker.
Hi Simon,
when i try to download the installation files with:
cd “C:\Temp\Office 2016”
setup.exe /download “C:\Temp\Office 2016\configuration.xml”
It creates the folders c:\Office2013\Office\Data , but nothing else is in there.
There is no proxy and i have the right permissions.
Do you know what to do?
Best Regards
Johnny
Hey Johnny
Have you modified the configuration.xml with the correct path?
Best Regards
Simon
Hey Simon,
thanks for your fast answer.
The configuration.xml is:
Best Regards
Johnny
Configuration>
Add SourcePath=”C:\Temp\Office 2016″ OfficeClientEdition=”32″ Branch=”Current”>
Product ID=”ProPlusVolume”>
Language ID=”en-us” />
/Product>
/Add>
/Configuration>
With < before everyline.. Didn't send correctly..
Regards Johnny
Hey Johnny
Sorry for the late answer. It looks like WordPress messed-up most of the XML. I suggest you create a Topic in the App-V TechNet Forum. Overe there we can help you better then here in the comments.
Best Regards,
Simon
Do I have to install OFFICE 2016 on the machine I am creating the appv package? I am getting ERROR at 20% while doing setup.exe /download “C:\Temp\Office 2016\configuration.xml”. Tried from 6 different machines. thanks
No, Office 2016 doesn’t need to be installed locally. In my tests, I always did it without a local Installation.
What is the length of your user id? If it is 8 or more characters there is a odd issue with creating Office 2016 packages. Create a user (ex: admin) and add to the administrators group. Log out and back in with the short user name.
Recommend that you use a VM that has never EVER had any form of Office installed.
Create the following folder structure:
c:\office2016
c:\office2016\Source
c:\office2016\PkgOut
Download and extract the ODT to c:\Office2016
create the CustomConfig.xml
– Snap Shot the VM.
My XML file:
+——————————————–
commands:
setup.exe /download CustomConfig.xml
setup.exe /packager CustomConfig.xml c:\office2016\PkgOut
Hope this helps.
Simon,
thanks for the quick reply. I am getting the error ” ERROR code 0-1007 (0) while doing the following command >setup.exe /download “E:\Temp\Office 2016\configuration.xml”
My config file
Tried on new Windows 2012 R2 server but failed on
setup.exe /packager “C:\Temp\Office 2016\configuration.xml” “C:\Temp\Office 2016 AppV”
” Something went wrong. Error code: 30016-7
Hi Simon,
I have successfully published the Office 2013 package but while unpublishing I am facing below issue
.
.
PS C:\Users\Admin\Desktop\Office 2013\Packages\AppVPackages> Unpublish-AppvClientPackage -Name Microsoft Office 15 ExcelRetail_en-us_x64
Unpublish-AppvClientPackage : A positional parameter cannot be found that accepts argument ’15’.
At line:1 char:1
+ Unpublish-AppvClientPackage -Name Microsoft Office 15 ExcelRetail_en-us_x64
+ ~~~~~~~~~~~~~~~~~~~~~~~~~~~~~~~~~~~~~~~~~~~~~~~~~~~~~~~~~~~~~~~~~~~~~~~~~~~
+ CategoryInfo : InvalidArgument: (:) [Unpublish-AppvClientPackage], ParameterBindingException
+ FullyQualifiedErrorId : PositionalParameterNotFound,Microsoft.AppV.AppvClientPowerShell.UnpublishAppvPackage
Please suggest how to resolve it.
Try to put the argument in quotes: Unpublish-AppvClientPackage -Name “Microsoft Office 15 ExcelRetail_en-us_x64”
Hi,
I have followed the instructuions above but am getting an error with the packager. Any help would be great.
I ran: setup.exe /download “C:\Temp\Office 2016\configuration.xml”
This completed and looks OK there is an office file with all the cabs.
When I run: setup.exe /packager “C:\Temp\Office 2016\configuration.xml” “C:\Temp\Office 2016 AppV”
I get the following Error:
?Invalid product ProPlusVolume specified. ??Error configuring products!?
We use volume licensing so need to build office with that in mind. My config file is as follows:
<!– –>
<!– –>
<!– –>
Any help would be great,
Thanks,
SV
Hi SV
I did some quick testing and I’ve got the same failure in my lab. I would contact Microsoft or wait a few days and try it again.
Best Regards,
Simon
Thanks for the quick reply, Ill give it a try on Monday and if not give them a call.
Did you find a solution for the problem? We get the same error when trying to package the application.
I tried to reach out to the Office Support on Twitter, but they couldn’t do anything. I suggest you open a Case.
Deploying Office ProPlus is no longer supported by Microsoft ODT using the packager switch. The completely removed the feature to deploy volume license software. The answer I got was that “If volume license should be used, you have to install it classical via MSI”.
Please see the following link for more information:
https://social.technet.microsoft.com/Forums/en-US/367938d8-9210-4c8f-aa5e-c8de41c0a7ca/odt-2016-invalid-product-proplusvolume-specified?forum=Office2016setupdeploy
Thanks for the update. I updated the blog post.
Another question, We have some customization that go down to the user via GPO. These customize the office experience. These wont work right as the machine technically does not have office on and associated until first run.
Is there a good way to deal with this?
As for the first run bit I need to remake the package with some extra configurations right?
The GPOs should work. They are getting written into the Registry and the virtualized Office should find those. I tested this recently with a virtualized Chrome and normal GPO Settings for Chrome. So this should definitely work.
Second question depends on what do you want to configure
I’ve App-V’d Office 2013 and 2016, and on both occasions I’d really recommend using a handy web application that creates the configuration XML script for you, when you enter your requirements in a simple form.
It can be found here, https://officedev.github.io/Office-IT-Pro-Deployment-Scripts/XmlEditor.html , saves all the niggles and scripting errors when writing the custom configuration file.
A real time saver in my opinion!
Excellent post by the way, clear, concise and with none of the MS waffle, thanks.
Thank you, I put the link in the blog post 🙂
I am late to the C2R/App-V party .. finally got ODT to make an App-V package, and it will publish via an app-v 5 server but it will not activate properly. I am using Product ID=”VisioStdXVolume” and have a KMS server, and am trying to use the ospp.vbs script but it always complains that it cannot find a valid product. Publishing the package globally does not help either.
Is volume activation really supported in this scenario?
I have tried using ODT with /configure with the very same config.xml file to install it as a C2R and that does work (clunky – need to run Visio once, then use ospp.vbs /act to make it license)
Haven’t tried that yet, to be honest. I c that you open a Thread in the TechNet Forums.
We are considering deploying Office 2016 Pro Plus (volume, not 365) with App-V. Is there a way to include our .MSP customizations when using the /packager. Can we insert /adminfile customization.msp. We have a number of configs like default file paths, registry tweaks, disable first run dialogs, etc. in our existing OCT file. While I understand that many of those configs can be put in GPO we’ve made an effort to move away from that to provide our desktop team greater control of the client application. So is there some OCT + ODT combination that I’m missing?
Hoi Simon,
I’m making a package with visio 2016 en project 2016.
I adjusted the xml file and everything is working out fine except when starting the package. Then I get the message: “This feature has been disabled by your administrator” error in Office 2016″.
Office 2016 is installed in the image en is installed locally at each client.
Office 2016 is installed locally in the image and Visio 2016 and project 2016 are in a app-V 5.1 bubble.
.
Hi Simon,
I have created MS Visio and MS Project 2016 Standard separately via ODT and deployed with App-V console. Once published on the target machines, I get the message “MS click to run has been stopped working with Integrator.exe error (BEX)”. Is there any setup I’m missing?
Need your advise to solve this issue.
*on the machines already build up with Office 2013 installed.
It is only supported to run one (1) App-V Package that contains Office Components. If you want to deploy for example Office Professional Plus 2016 and Visio 2016 you have to create 1 Package with both components in it.
Hi,
I have created 2 separate App V Package for (Visio and Project (2016 version)).
I have used ODT to download the Source file (for Visio and Project) and then used /packager command line argument to create the APPV Package. Can I publish both (Visio and Project 2016) APPV package through APPV Management console ? .
I have successfully published APPV package created for Visio 2016 and when I am trying to Publish Project 2016, I am getting error as stating A version of this package with version 16.0.11231.20174 is already present on the server.
Please note We have Local install of MS Office on the systems and we are using KMS for License Activation.
Please help.
Hi Ashish
Have you solve this Problem. We have the same Issue.
I have created Office365 virtual package, along with ODBC DSN settings for excel. Package includes only excel and Odbc dsn settings.For that I have created connection group. DSN settings package is created with AppV5.1 . Package is working fine on both Windows 10 and Windows7 , but on Windows 7 , excel takes around 2-3 min to launch. On Windows 7 , I have AppV 5.0 sp2 client installed.My problem is how to resolve this time lag by excel?